|
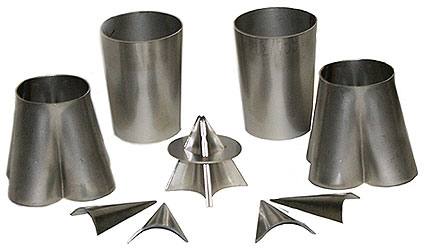
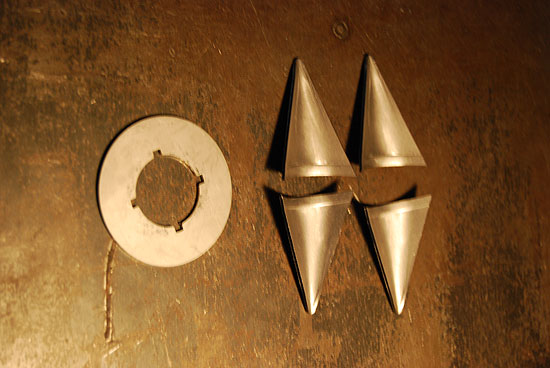
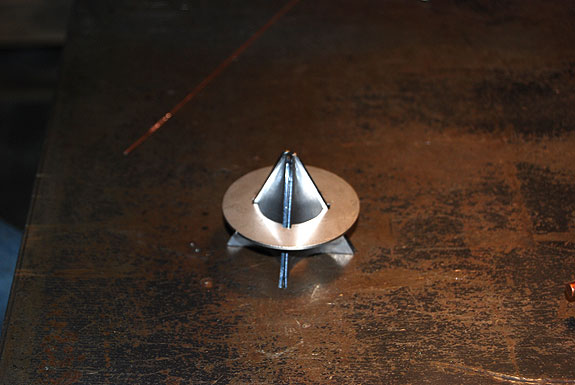
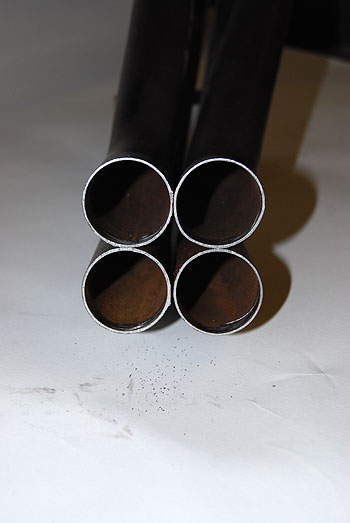
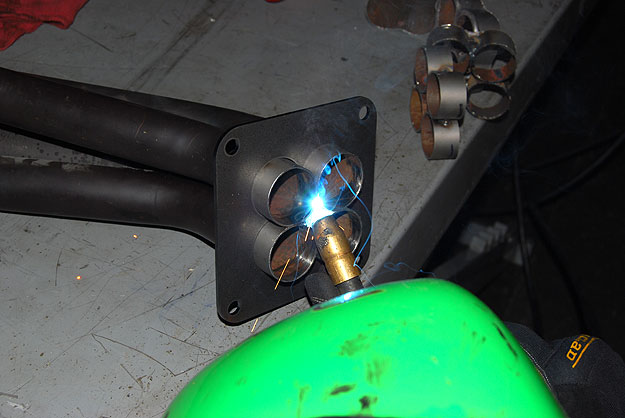
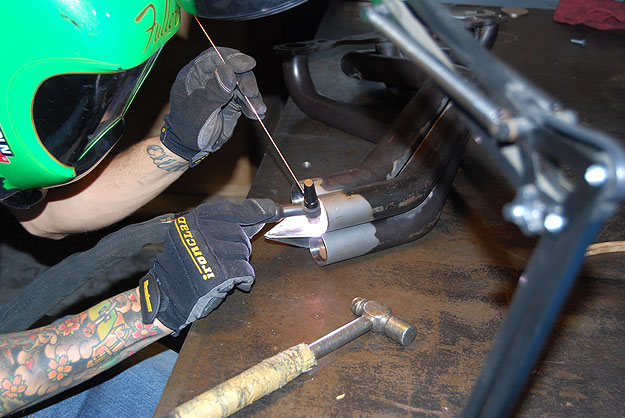
Begin by assembling the merge bullets. The
top left photo shows what one set of bullets looks like. Start
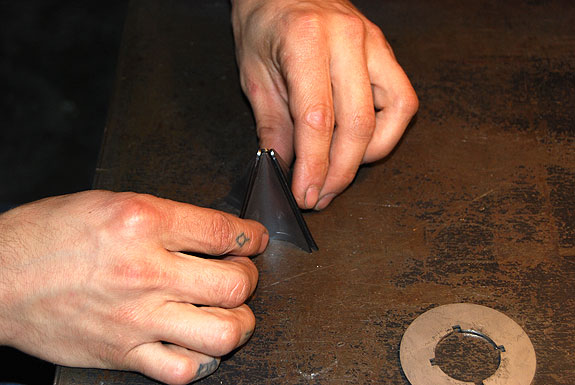
by standing them together as shown in the top right photo and
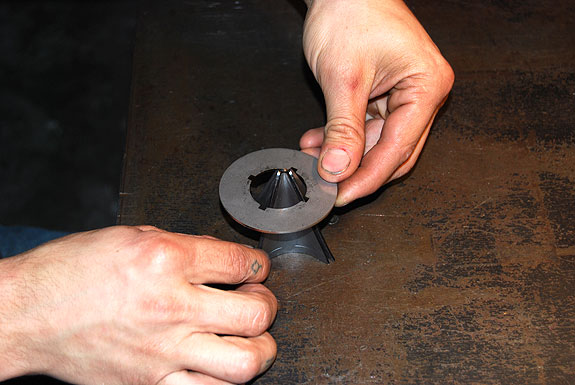
slip the round assembly tool over the top as seen in the bottom
left photo. The notches in the tool should line up with
the sides of the merge bullet
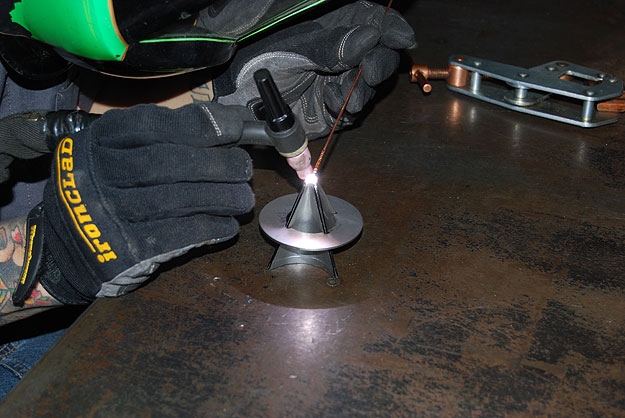
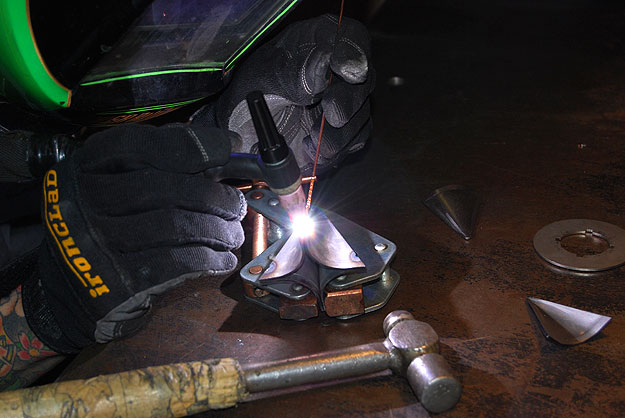
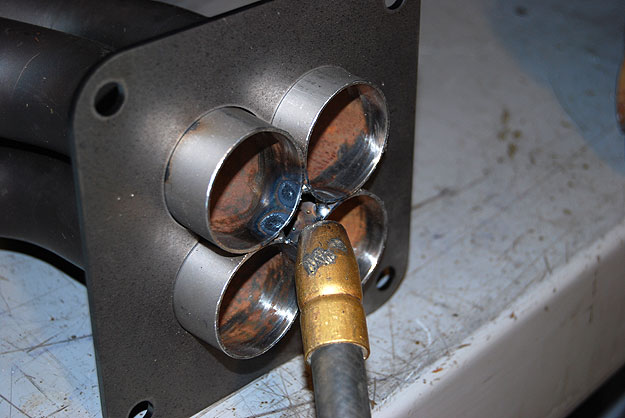
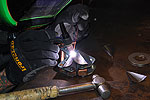
Now you’re ready to tack-weld the bullets as shown in
this next group of photos.
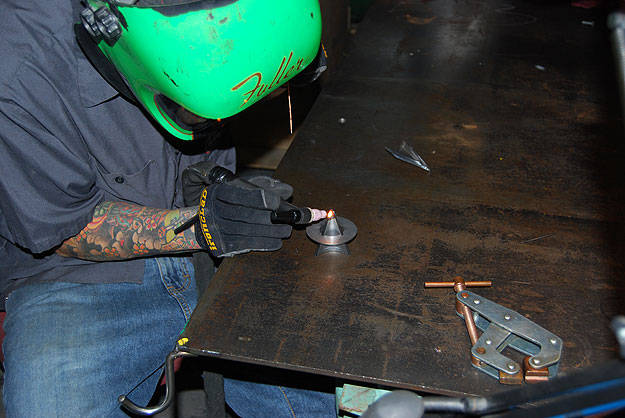
Remove the assembly tool and make your finish
welds.
| Click
image to enlarge |
 |
|
 |
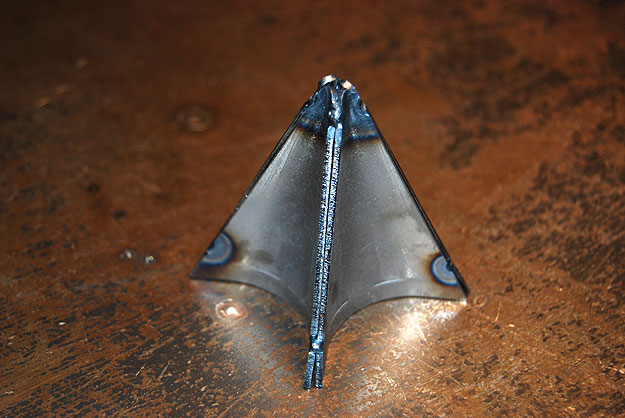
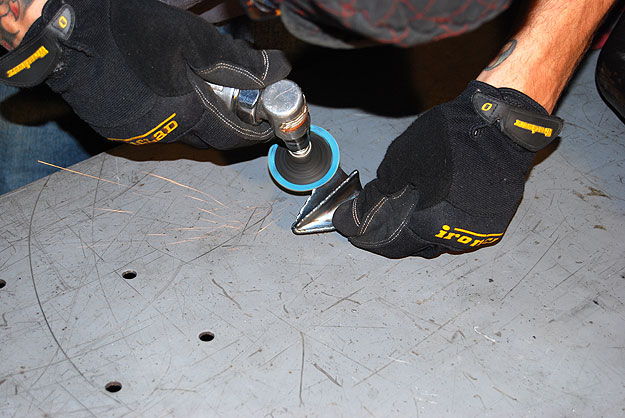
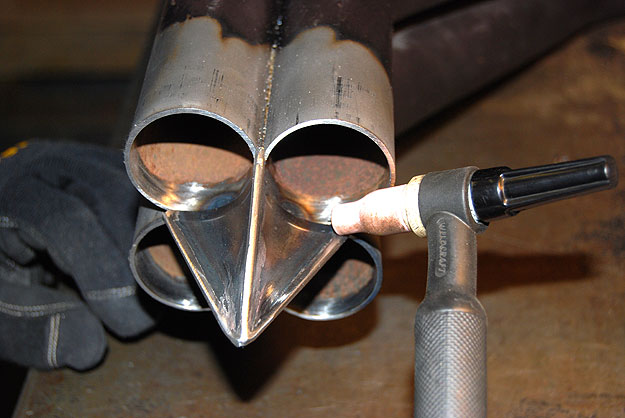
After welding, a little cleanup should be done to optimize
air flow.
Here is a comparison of what the welded merge bullets
look like before and after cleanup.
Now that we’ve finished the prefabrication,
let’s
finish up the headers. The primary tubes need to be square
and flat before the merge bullets and collectors can be welded
into place. To keep the tubes aligned and square, we created
a series of jigs that slide over the primaries: Weld-On
Collector Header Tube Alignment Tool. click here >>
To start your collector fabrication, just
slip the jig over the primary tube as you see below. You
can do this without the jig, using clamps and a square, but
the jig makes it easier and faster. The jigs are also reusable;
they’re great
for building slip fit collectors and can also be used to assist
in designing and fabricating the header primaries while in
the vehicle or on an engine stand.
You have the tubes nice and square so now they can be tack-welded
together. We do this before grinding them flat so that
they stay in position while grinding. Place your tacks
in the center of the primaries to make it easier to slip the
jig off. Nice light tacks will do, since it’s just
to get through this next couple of steps where the real strength
will be added. Once you’ve made your tack welds
make sure the primaries are flat and square. A square
or even a flat table helps make sure you did a good job grinding
the primaries.
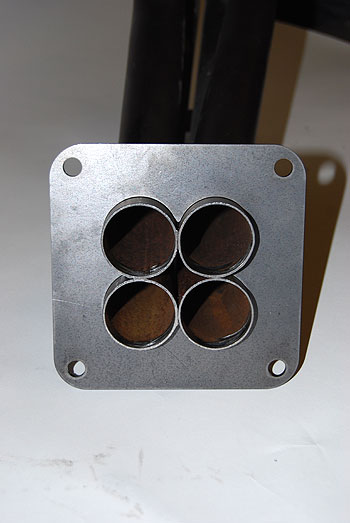
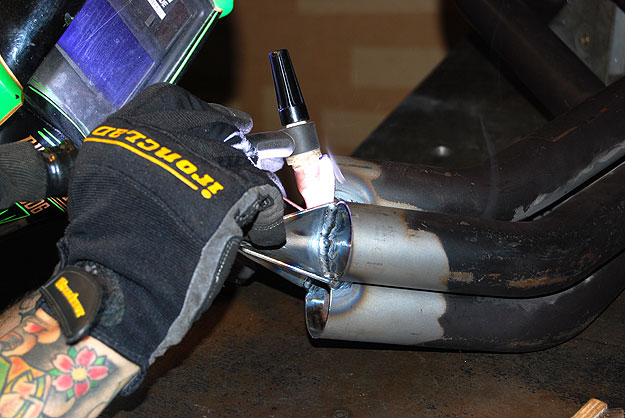
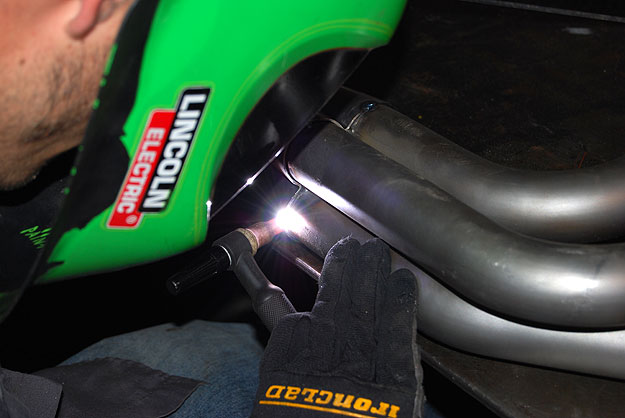
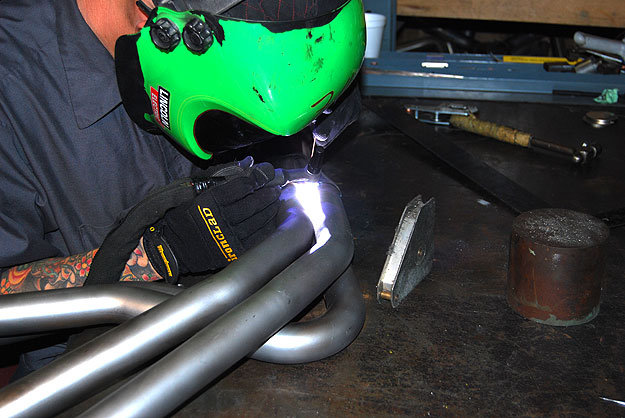
Once you have confirmed that the primaries are flat and square,
the bullets can be welded into place. In the first photo,
the previously assembled merge bullet has been aligned and
tacked into place. Our merge bullets are designed to
the specific tube diameter so that you will get a nicely matched
joint. You’ll generally want to make your welds
on opposite sides to help compensate for material shrinkage. In
the second photo you can see a finished weld as he is working
on the last port.
Here you can see the welds being cleaned up and
blended.
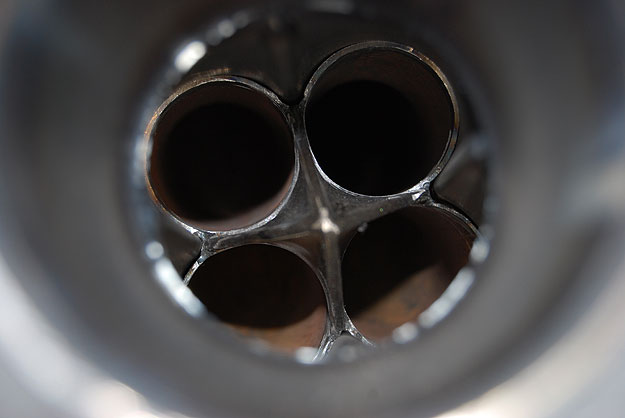
Our next step is to slip the collector over the primaries
to make sure we have a good fit. The first photo gives
you a good look inside the collector to see how it all fits
together. If you have any large gaps you can use clamps
and some metal wedges to pull the collector down closer to
where you will be welding them to the primaries. The
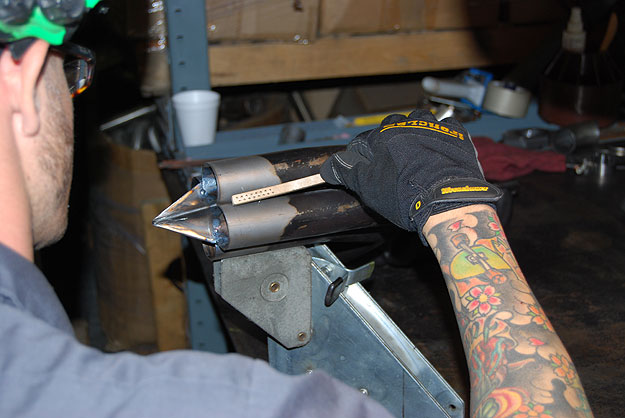
second photo shows you another great trick - drop a small bead
of weld into the area shown being cleaned. Doing this
before welding on the collector is a lot easier than after
you have tacked it into place!
We’re entering the home stretch! Now we take our
collector and slip it over the merge bullet onto the primaries.
Since we had already laid a little filler under the corners
in the last section, we are ready to tack the collector into
place and make our finish welds.
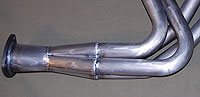
There it is! The finished header with the collector
installed! On this particular build you can see that
we also added a transition cone to help increase exhaust gas
velocity. We had also added a 3-bolt flange to mount
up to our exhaust system.
| Click
image to enlarge |
 |
|